First Run & Commissioning
Powering up a newly installed FizzWizz for the first time, the pre-flight fixture setup, and what to confirm before the unit goes into service.
First run and commissioning
This is the first power-on after installation. It covers the pre-flight fixture setup, confirms the unit is functional, and hands off to a full Health Check before the unit goes into service.
Pre-flight setup
The FizzWizz is commissioned with both hoses disconnected and CO₂ connected to the CO₂_In port. This is the arrangement the Health Check expects — you are testing the unit in isolation before introducing it to a live tank.
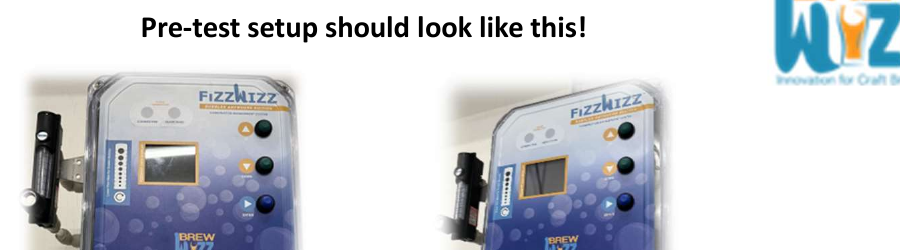
Disconnect both hoses and connect CO₂ to the CO₂_In port before powering on.
The FizzWizz must be powered OFF before disconnecting or reconnecting any hoses. This is the first rule of the Health Check and applies to commissioning too.
You will need
- CO₂ supply with regulator (30–40 psi)
- Wall-wart power supply for the FizzWizz
- Stone hose and carbonation stone
- Arm hose with separator
- Push-to-connect jumper hose
- Disposable glove
- Printed Results Form
The fixture setup
Power OFF
Ensure the FizzWizz power is OFF.
Disconnect the stone hose
Disconnect the stone hose from the unit.
Disconnect the arm hose
Disconnect the arm hose from the unit.
Connect CO₂
Connect the CO₂ supply from the regulator to the CO₂_In port.
Set the regulator
Set the CO₂ regulator to approximately 30–40 psi.
Connect the temperature sensor
Ensure the temperature sensor is connected to the FizzWizz.
This is Check 1 — Setup & Power Check. Work through that page for the power verification step.
Confirm the power supply
Connect the wall-wart power supply to the FizzWizz and to a live outlet. The green power light on the supply should illuminate.
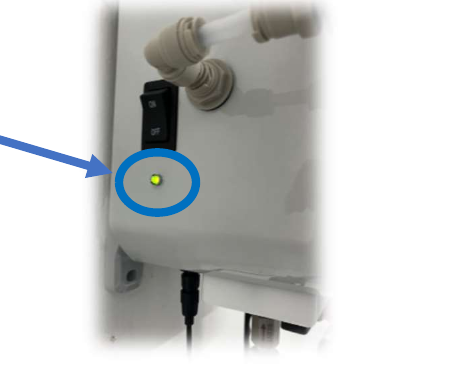
The green light confirms the power supply is functional.
If the green light is off, first confirm the outlet is live and the barrel connector is fully seated. If it remains off, replace the plug-in power supply.
Run a full Health Check
Do not put the unit into service until it passes a Health Check. The Health Check exists to catch exactly the problems that commissioning can introduce — a misconnected hose, a stuck solenoid, a leak, a reversed valve.
The Health Check is a structured 7-check sequence using A–X ident letters. Work through it in order and fill in the Results Form as you go.
| Check | What it confirms |
|---|---|
| Check 1 | Setup and power supply |
| Check 2 | Display values on the CO₂_In circuit (A–C) |
| Check 3 | Solenoid function on CO₂_In (D–J) |
| Check 4 | Solenoid function on ARM (K–Q) |
| Check 5 | Display values on the ARM circuit (R–T) |
| Check 6 | Leak testing (U–V) |
| Check 7 | Stone hose and isolation valve (W–X) |
Record actual measured values, not just pass or fail. The numbers help diagnose borderline or intermittent issues later, and support will ask for them. A completed form with real values is the single most useful thing you can provide when calling support.
Confirm the installation is complete
Before handing the unit over:
- Green power light confirmed
- Full Health Check run and passing
- Results Form completed with measured values
- CO₂ supply reconnected to normal operating position
- Stone hose reconnected and stone installed in the tank
- Arm hose reconnected through the separator
- Swiffer valve closed
- Unit reporting to the dashboard with an Online health badge
- Device assigned to your organisation
- Alert rules and notification preferences configured
- Flow rate set using the CO₂ flow rate calculator
Next step
Post-Install Health Check
Move to the full Health Check sequence.